
 (11 votes, average: 4.64 out of 5)
In previous tutorials, we looked at getting started with the Synology DS920+. We also explored how you can start and shut down your Synology NAS. However, to make those posts concise, we never looked at setting up a new Synology NAS. We remedy that situation in this post on setting up the Synology DS920+ NAS.
You first access your Synology NAS device by visiting the Synology Find site in your web browser. If all goes well, and if you have connected your cables properly, you should see the Find Your Synology NAS screen in your browser, as shown below.
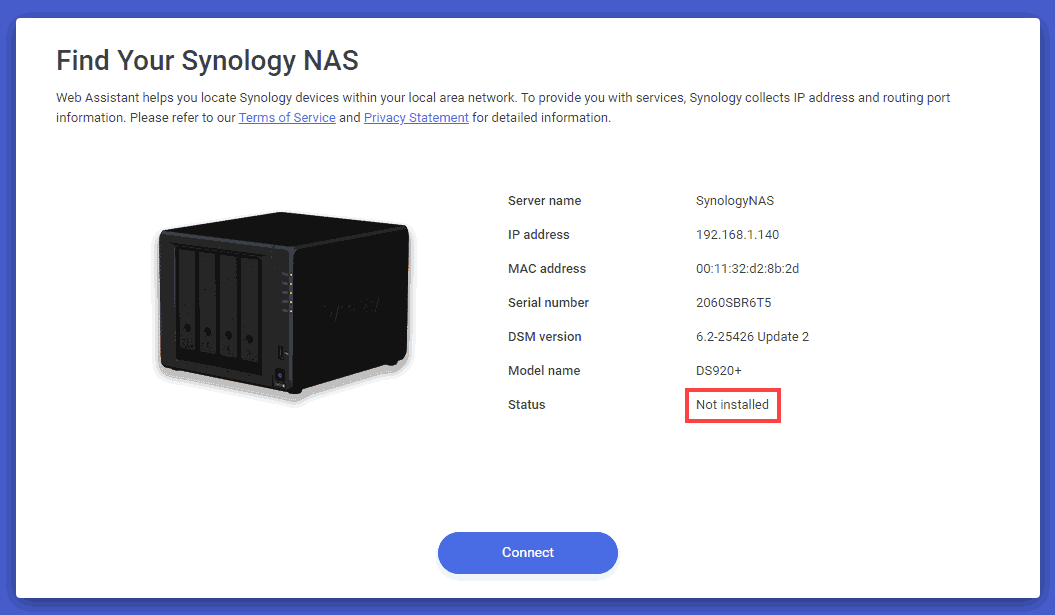
Synology NAS Not installed
Do note that the Status shows as Not installed, highlighted in red. This means you need to install the Synology operating system on your NAS, and we will learn more about this operating system soon. For now, we need to click the Connect button to proceed.
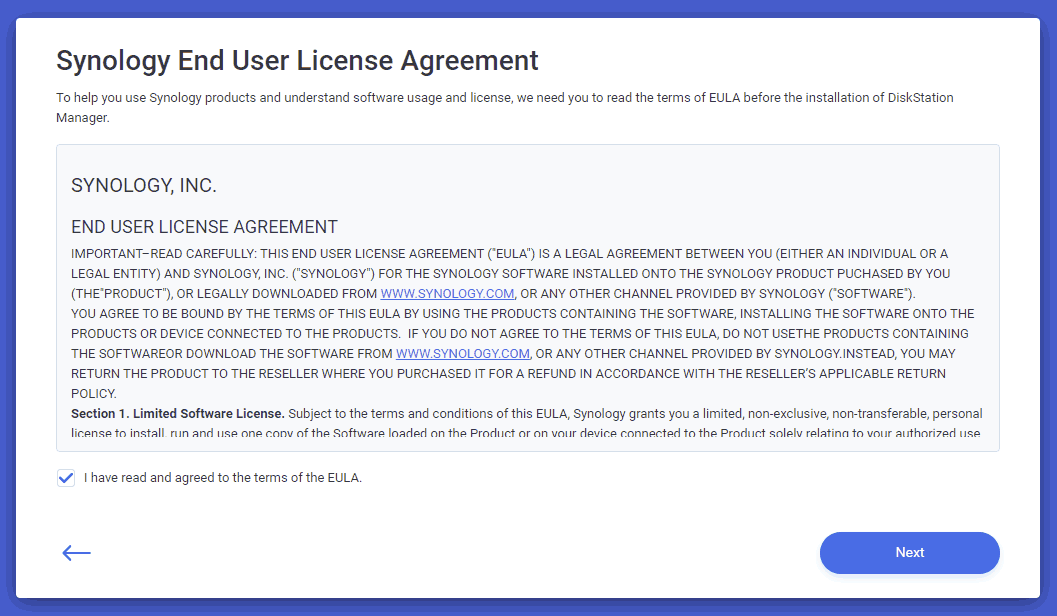
You’ll see the Synology End User License Agreement window, shown below.
Synology End User License Agreement
Place a checkmark next to the I have read and agreed to the terms of the EULA option, and click the Next button. You will next see a similar-looking Synology Privacy Statement window. To proceed, you will click the Continue button.
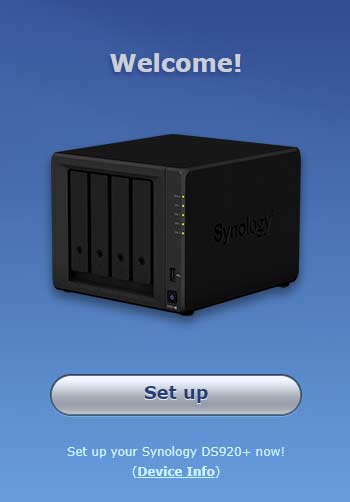
Next, you will see the Synology Welcome screen, shown below.
Synology Welcome screen
You’ll need to click the Set up button to proceed.
You’ll next see the Install DiskStation Manager screen, shown below. The DiskStation Manager, often abbreviated to DSM is the proprietary Synology operating system that resides on your NAS device.

Install DiskStation Manager
By default, the latest version of DSM is downloaded and installed, but you can choose the Manual Install link and choose to install a previous version. We decided to go with the defaults and clicked the Install Now button.
The DSM install may show you a warning message window that warns you about the deletion of any existing data on the hard disks inserted within the Synology NAS (Adding hard disks physically to the NAS was explained in the Getting started with the Synology DS920+ post). You will have to accept the warning and proceed.

Synology data warning
The installation takes around 10 minutes, and you can see the percentage-wise progress of the process.
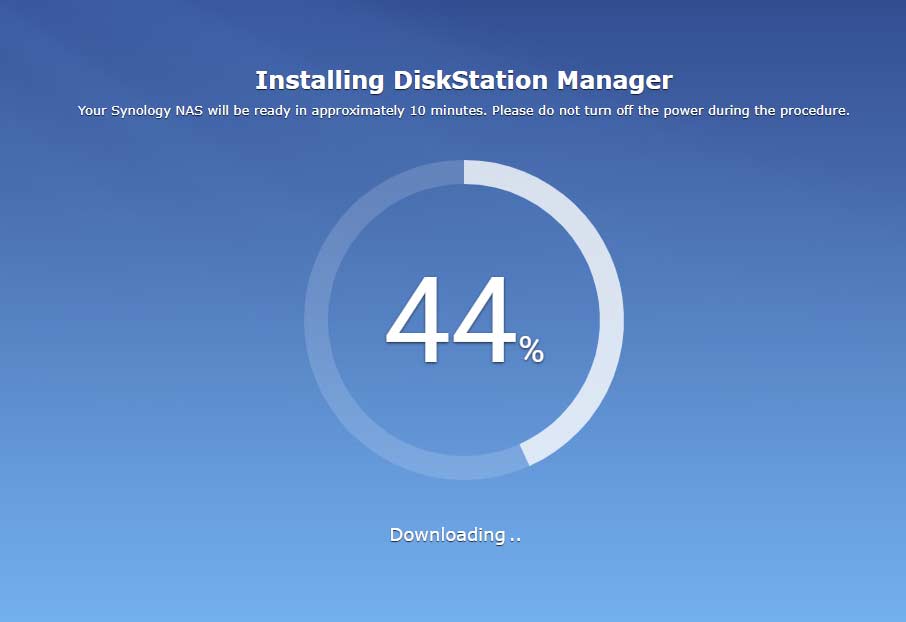
Installing DiskStation Manager
You are next prompted to create an Administrator account for your Synology NAS. This is a local account that you will use to sign into the Synology DSM interface.

Create an Administrator account
You are now asked to create a new Synology account, or sign in to your existing Synology account so as to be able to use the Synology QuickConnect feature.
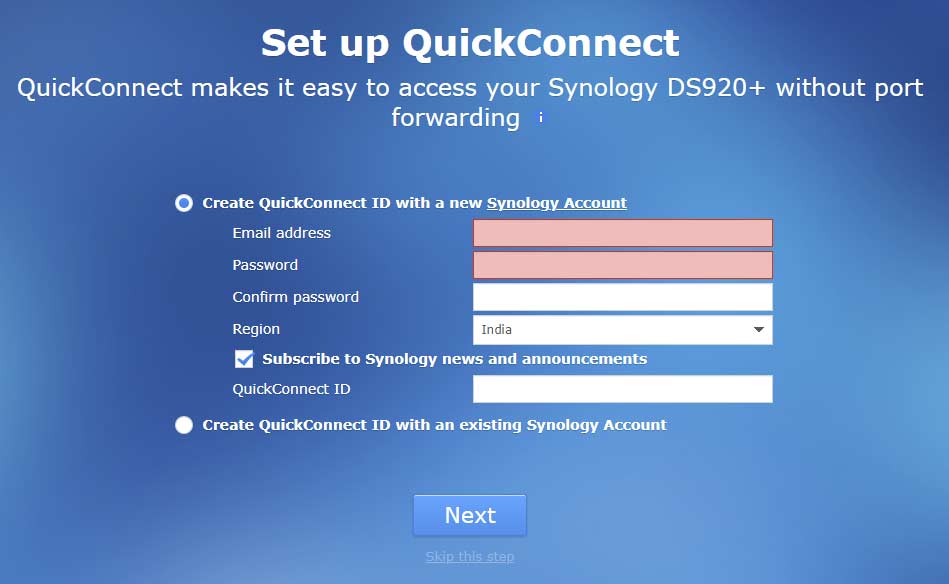
Set up QuickConnect
Next, you are provided an option to drag a shortcut to your desktop that uses the QuickConnect feature to easily access your DSM. Do note that you can still use the Synology Find site option to connect to your Synology DSM, if you select an option we discuss next.

QuickConnect is ready
You now see the option to enabling sharing of your Synology device’s network location. We accepted this option and clicked the Go button.
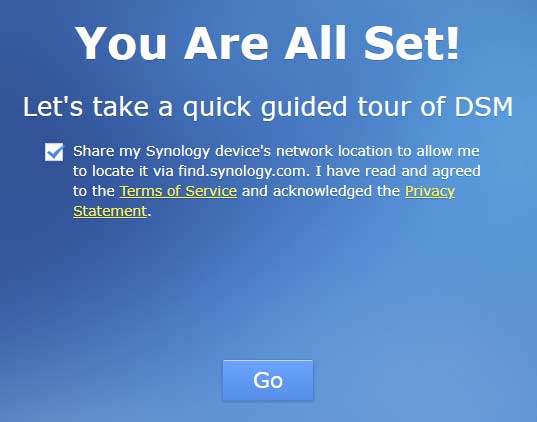
You Are All Set
Now, you get to the DSM interface, but there’s one more screen to tackle. This one tells you that Smart Updates will take care of updating your DSM. Note this is not an option for you to choose, but just some information provided to you. You click the Got It button to finally work with the DistStation Manager OS from Synology. You will also have to accept more agreements to send your device data to Synology.
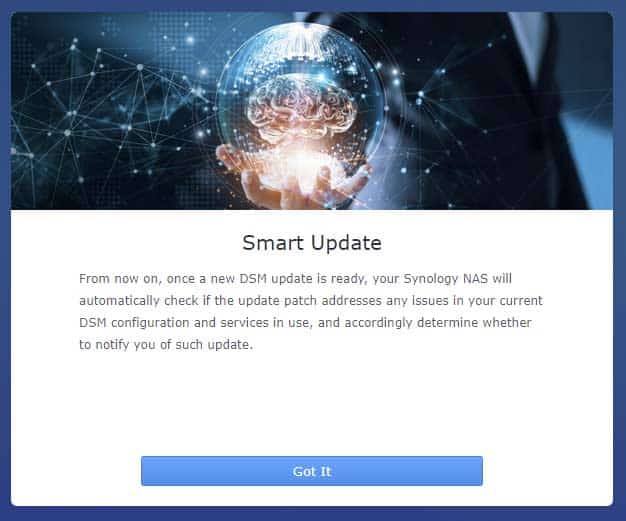
Smart Update
Finally, your Synology DS920+ is ready to be used with the DSM operating system installed. In our next tutorial, we will look at setting up your storage.